Learn how to use OpenArt AI, its unique features, and useful applications in this blog post. You will also learn about its advantages and disadvantages, which will help you determine whether it is the best tool for your photo editing needs. Whether you are a novice or an expert, this post will improve your editing experience.
Introduction:
Among the most potent tools available to artists of all skill levels is OpenArt AI. Regardless of your level of experience, this OpenArt AI lesson will walk you through all of its features, from creating your first piece of art to honing more complex designs. You will become proficient in utilizing OpenArt AI to realize your artistic ideas by the end.
What is OpenArt AI?
- Definition: OpenArt AI is an intuitive platform that transforms text prompts into visual images using generative AI also, it provides so many image editing tools for free.
- Target Users: Digital artists, Social media content creators, Marketing teams, and Hobbyists exploring AI art.
What are the benefits of OpenArt AI?
Key Features of OpenArt
- User-Friendly Interface
- Unleash limitless creativity with AI-powered drawing tools that remove artistic boundaries, letting you experiment freely.
- Streamline your workflow by editing, iterating, or enhancing artwork effortlessly with advanced AI tools.
- Discover endless styles – explore diverse artistic possibilities and transform ideas into unique visual masterpieces.
- Empower your projects by training custom AI models in minutes tailored to your creative vision.
Getting Started with AI How to Use OpenArt AI – Step-by-Step Guide for Beginners
Step 1: How To Access and Make an Account:
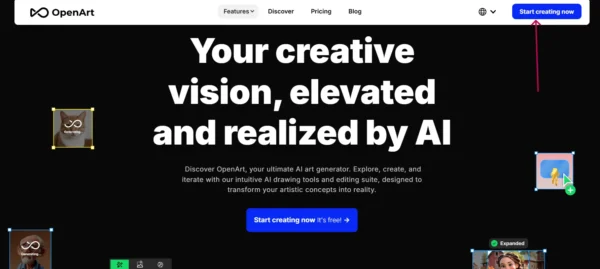
- Go to the OpenArt Website Get started now
Creating an Account and Logging In
- Click on Sign up/Log in at the top right corner.
- You can sign up using your email, Google, or Twitter account. Signing up gives you 40 one-time trial credits, to be used across features.
OpenArt AI Download:
- There is no need to download apps because they don’t have any—just quickly go to the website and use this AI.
Step 2:
OpenArt AI Tools and Function
A. OpenArt AI Image Creating Tools
| Feature | Description |
|---|---|
| Text to Image | Generate images from text prompts (e.g., “a futuristic robot in a neon city”). |
| Image to Image | Transform or enhance existing images using AI (e.g., adjust style or details). |
| Style Reference | Apply pre-defined or custom art styles (e.g., Van Gogh, cyberpunk). |
| Pose Reference | Use pose templates to guide character positioning and movement. |
| Composition Reference | Control layout and element placement (e.g., rule of thirds, symmetry). |
| Train Customized Models | Personalize AI models by training them on your own datasets or styles. |
| Bulk Create | Generate multiple artworks simultaneously for efficiency (e.g., 10+ variations). |
1. How to use OpenArt AI Text to image tool?
Quickly turn your ideas into images using the Text to Image tool, which includes an auto-prompt assistant, hundreds of models, and reference image uploads for full control.
Click “Text to Image” from the dashboard.
- Navigate to the “Create” dashboard and pick from styles like:
- Hyperrealistic
- Anime
- Abstract
- Vintage poster
- Write Your Prompt: Be specific and detail prompts Include details like colors, mood, or artistic style
- Customize Settings
- Adjust Advanced Settings
- Resolution: Higher res (Pro only)
- Aspect Ratio: Square, portrait, or landscape.
- Generate and refine:
- Click “Create” → Wait 10-30 seconds.
- Like the result? Click “Download” (PNG/JPG).
- Not satisfied? Click “Remix” to tweak the prompt or settings.
Fixing Common Problems
Problem 1: “The image looks nothing like my prompt”
- Solution:
- Add more details: Instead of “a dog,” write “a golden retriever puppy playing in a meadow, soft sunlight, photorealistic.”
- Use style keywords: Try “digital art,” “watercolour sketch,” or “8-bit pixel art.”
Problem 2: “The image is blurry/low quality.”
- Solution:
- Increase resolution (e.g., 1024×1024 or higher).
Problem 3: “I don’t know which style to pick.”
- Quick Fix:
- Test styles with the same prompt.
2. How to use OpenArt AI Image to Image tool?
Using our powerful image-to-image tool, transform any image with AI to create unique artistic variations or effortlessly refresh existing visuals.
- Describe your prompt or use draw reference,
- Generate image,
3. How to use OpenArt AI Style reference tool?
The Style Reference Tool helps users modify images by changing the time of day, turning photos into sketches, and altering textures. It enables transformations such as converting a day scene into a night scene, adjusting seasons and weather, or enhancing artistic expression through texture changes. This tool is perfect for creating dramatic visuals, improving storytelling, and producing unique illustrations with just one reference image.
- Upload an image you’d like to change.
- Upload a style reference image.
- See your vision come to life.
4. How to use OpenArt AI Pose reference?
The Perfect Poses Tool ensures accurate and consistent poses in your artwork by using Pose Reference Matching. Simply upload a reference image, and OpenArt will replicate the pose, allowing you to create precise and visually appealing compositions that align with your vision effortlessly.
- Describe the image you want to create
- Upload a pose reference image
- Generate.
5. How to use OpenArt AI Composition reference?
The Composition reference tool helps you achieve precise and visually appealing layouts. Simply upload a reference image, and OpenArt will replicate the composition, ensuring a well-structured and balanced design that aligns with your creative vision effortlessly.
- Describe the image you want to create.
- Upload a composition reference image.
6. How to use OpenArt AI Train customized Models tool?
Create personalized and precise AI models for your projects with ease. Tailor your model to your creative needs and ensure consistent, high-quality results.
- Select Your Model Type: Choose from style, character, face, or object models to match your project’s focus.
- Name Youe Model
- Define Your Model: Describe to ensure clarity and accuracy in the results.
- Upload Image Samples: Upload 4 to 128 high-quality images to train your model. The more diverse the samples, the better the results.
- Generate and Share: Use your trained model to generate consistent images, and share them with the community or keep them private.
7. How to use OpenArt AI Bulk Create tool?
Easily generate multiple images in bulk with customizable prompts and settings. Streamline your creative process and get high-quality results effortlessly.
- Choose Your Method: Enter a single prompt for multiple images or upload a .csv/.txt file with custom prompts.
- Set Your Preferences: Select your model, adjust settings, and specify the number of images (up to 500).
- Sit Back and Relax: Start the bulk creation process and let the system generate your images. Check back later to download your high-quality results.
Advanced Tips for Mastering OpenArt AI
- Use negative prompts (e.g., “no blurry edges”) to exclude unwanted elements.
- Combine styles (e.g., “watercolour + steampunk”) for unique results.
- Export in PNG/SVG for edits in tools.
B. OpenArt AI Image Editing Tools
| Feature | Description |
|---|---|
| Blend Image Layers | Combine or merge multiple image layers seamlessly. |
| Style Transfer | Apply artistic styles from one image to another. |
| Inpainting | Fill in missing or damaged parts of an image intelligently. |
| Fix Hands / Faces | Automatically correct distortions in hands or facial features. |
| Change Facial Expressions | Modify facial expressions (e.g., smile, frown) in images. |
| Upscale Image | Increase image resolution while preserving quality. |
| Expand Image | Extend the boundaries of an image (e.g., “uncrop” or add space). |
| Change Background | Replace or edit the background of an image. |
| Remove Background | Delete the background to isolate the main subject. |
| Magic Remover | Erase unwanted objects or elements from an image. |
| Find and Replace | Locate specific elements in an image and replace them with alternatives. |
1. Blend Image Layers:
Seamlessly combine multiple image layers to create unique compositions. This tool helps in blending visuals smoothly for a cohesive design.
- Upload Background Image
- Add Layer to Blend
- Arrange place and resize the elements.
- Click ‘Blend’ to see the results.
2. Style Transfer:
Apply the artistic style of one image to another. Transform your photos into stunning artwork inspired by famous styles.
- Upload an image to change its style now.
- Upload a style reference image
3. Inpainting:
Effortlessly fill in or repair missing parts of an image. This tool intelligently restores or modifies specific areas while maintaining a natural look.
- Select the area you want to edit.
- Describe your desired changes.
4. Fix Hands / Faces:
Improve distorted hands and facial features in AI-generated images. Ensure more realistic and refined details for professional-quality visuals.
- Upload an image you’d like to improve.
- Draw over the area you want to fix.
5. Change Facial Expressions:
Modify facial expressions in images with ease. Adjust emotions naturally to match the desired mood or storytelling.
- Upload High-Quality Images
- Subtle Adjustments
- Consistent Lighting
- Use Presets Wisely
6. Upscale Image:
Enhance image resolution without losing quality. This tool sharpens details, making images clearer and more professional.
- Access the tool
- Upload your image
- Choose upscaling mode
- Set upscale level
- Generate enhanced image
7. Expand Image:
Extend the canvas of an image while maintaining realistic details. Perfect for adjusting framing or adding more background elements.
- Upload Your Image
- Wait for Processing
- Adjust Dimensions
- Create and Download
8. Change Background:
Swap the background of any image effortlessly. Replace scenes to match creative concepts or professional needs.
- Upload Your Image
- Wait for Processing: Once the file is uploaded, wait for it to load completely. You will then be automatically redirected to the next page.
- Specify Your Background
- Create and Download
9. Remove Background:
Instantly eliminate backgrounds to isolate subjects. Ideal for product photography, graphic design, or creative edits.
- Upload Your File: Drag and drop your image.
- Wait for Processing: Allow a few moments for the file to load. Once completed, you will be automatically redirected to the next page.
- Choose Versions
- Create and Download.
10. Magic Remover:
Erase unwanted objects from images seamlessly. This tool intelligently fills in removed areas for a clean, polished look.
- Upload image
- Draw over what you want to remove
- Click ‘remove’ and let the magic happen
11. Find and Replace:
Detect specific elements in an image and replace them with alternatives. This feature simplifies edits while maintaining visual harmony.
- Upload Your File: Simply drag and drop your image.
- Wait for Processing.
- Specify Changes: Enter the object you want to replace in the “Search for:” field and the new object in the “Replace with:” field. You can also choose how many versions of the edited image you want, with four being the default.
- Create and Download.
C. OpenArt AI Apps tools:
| Feature |
|---|
| Image to Video |
| AI Filters |
| Sketch to Image |
| Creative Variations |
| Image Blender |
| QR Code Generator |
1. Image to Video:
Convert static images into dynamic videos with smooth transitions.
- Upload your image
- Adjust creativity level
- (optional) Describe what you want for better output.
2. AI Filters
Apply advanced AI-powered filters to enhance and stylize images instantly.
- Upload Photo
- Pick a style
- Adjust Creativity
- Number of images
3. Sketch to Image
Transform hand-drawn sketches into realistic or artistic digital images.
- Upload your sketch
- (required) Describe what you want for better output.
- (optional) Adjust Creativity
- (optional) Pick a style
- (optional) Pick a colour theme
- (optional) Reference image for the style
- Number of images
4. Creative Variations
Generate multiple creative versions of an image with different styles and elements.
- Upload your image
- (optional) Describe what you want for better output.
- (optional) Adjust Creativity
- (optional) Pick a style
- Number of images
5. Image Blender
Merge multiple images seamlessly to create unique compositions.
- Upload the image for the composition
- Upload the image for the style
- (optional) Describe what you want for better output.
- Number of images
6. QR Code Generator
Create custom QR codes for links, text, or digital interactions.
- Type your URL or other supported
- Pick a style
- (optional) Or use your prompt
D. OpenArt AI Create Consistent Character:
1. Start with Description
Describe your character. You’ll preview visuals before finalizing.
- Write Character name
- Describe your character
- Select Style
2. Start with One Image
Upload one image to guide the design.
- Write Character name
- Reference image
- Upload one reference image to guide your character’s design.
- Use a high-quality image of a human-like character.
- A half-body or full-body portrait works best. Include only what you want in the design—extra objects, like a hat, may become part of the character.
3. Start with 4+ images
Have 4+ high-quality images? Skip previews and create characters directly.
- Write Character name
- High-quality reference images upload at least 4 images.
OpenArt AI Results of Image and Video:
Creating First Hour One Text to image using different models:


Pros and Cons of OpenArt AI
Advantages:
- Easy-to-use interface.
- Fun and creative applications.
- Easy to use
- High-quality output
- Time-saving
- User friendly
- Enhance Creativity
Drawbacks:
- Limitations in free versions
Additional Resources:
- Blog
- Prompt Book
- Email Us
- Discord – If you join you will get 50 trial credits to generate any thing.
- Prompt Template
- Video Tutorials
- Youtube
- Discord
Practical Applications or Use Cases of OpenArt AI
- Graphic Design & Branding – Create custom graphics, logos, and brand visuals.
- Animation & Video Production – Convert static images into dynamic videos.
- Content Creation & Social Media – Generate eye-catching visuals for social media posts.
- Photography & Image Enhancement – Upscale low-resolution images while preserving quality, Remove or replace backgrounds effortlessly.
- QR Code Generation & Customization
- AI Art & Digital Illustrations – Generate unique AI-generated artwork for personal or commercial use.
OpenArt AI Pricing and Plans:
FREE PLAN
Here is a table outlining the features and details of the Free plan:
| Features | Details (Free Plan) |
|---|---|
| Credits | One-time 40 trial credits for 7 days |
| Number of images | Up to 40 per month |
| Custom Model Training | 0 |
| Character Creation | 0 |
| Turbo Points | 0 |
| Parallel Generations | Up to 4 |
| Public Models | Available |
| Available Features ( Limited period of time ) | Image Guidance, InPainting, Remover, Expand, Stylize, Blend Board, People Editor, Upscale, Find & Replace, Bulk Create, Priority Support, Sketch to Image, AI Filter, Creative Variation, Image Blender, AI Sticker Generator, Change Facial Expression, Fix Fingers, Remove Watermark, AI QR Code |
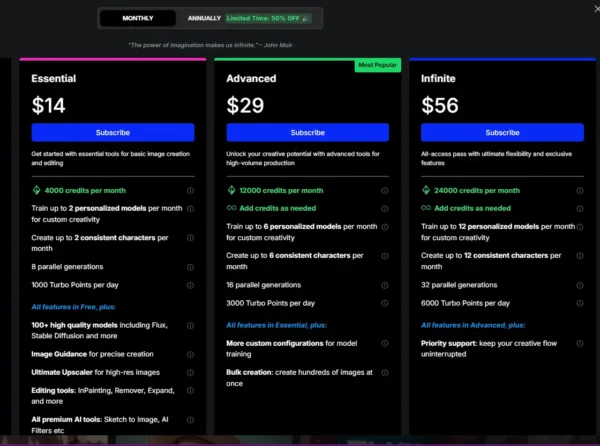
Here is the table comparing the Essential, Advanced, and Infinite plans:
| Features | Essential Plan | Advanced Plan | Infinite Plan |
|---|---|---|---|
| Credits | 4000 credits per month | 12000 credits per month | 24000 credits per month + add-ons |
| Number of images | Up to 4000 per month | Up to 12000 per month | Up to 24000 per month |
| Custom Model Training | Up to 2 per month | Up to 4 per month | Up to 6 per month |
| Character Creation | Up to 2 per month | Up to 6 per month | Up to 12 per month |
| Turbo Points | 1000 points/day | 3000 points/day | 6000 points/day |
| Image Guidance, InPainting, Remover, Expand, Stylize, Blend Board, People Editor, Upscale, Find & Replace, Bulk Create, Priority Support, Sketch to Image, AI Filter, Creative Variation, Image Blender, AI Sticker Generator, Change Facial Expression, Fix Fingers, Remove Watermark, AI QR Code | Available | Available | Available |
MONTHLY PLAN
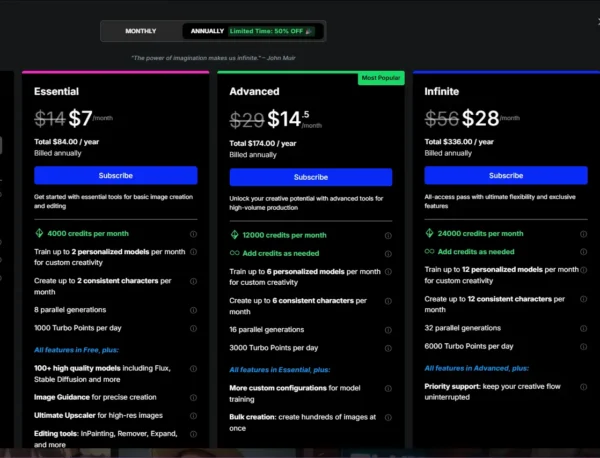
YEARLY PLAN
Conclusion:
Now that you’ve learned how to use OpenArt AI, it’s time to experiment! Share your first creation in the comments, or explore the guide to Top 5 AI Art Generators in 2025. Remember: great art starts with a single prompt. This OpenArt AI review article will help you understand how AI is used in work and how much it is worth.
FAQs:
-
Is OpenArt AI free to use?
Yes! you can use this AI-free plan offers 40 credits.
-
Is OpenArt AI safe?
Yes, OpenArt AI is generally safe to use, as it follows standard security practices, but users should review its privacy policy and terms to ensure their data is handled securely.
-
Can OpenArt AI be used for commercial purposes?
Yes, commercial licenses are included in Pro plans.
-
How do I improve my AI art quality?
Use detailed prompts, adjust settings, and use the “Remix” feature
Top OpenArt AI Alternatives Tool in 2025: